The Arduino Uno
Getting started with the Arduino Uno R3
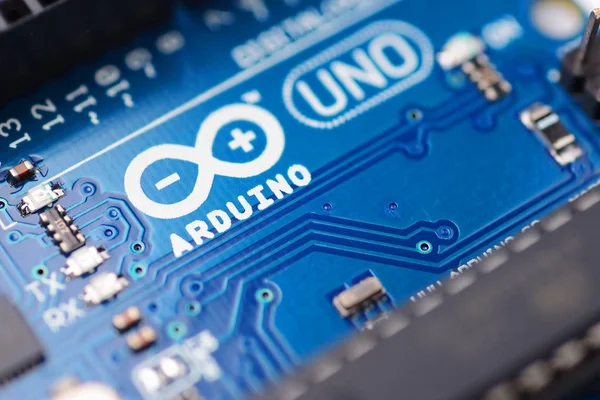
What is the Arduino Uno R3?
The Arduino Uno R3 is a microcontroller board based on the ATmega328P. It’s part of the larger Arduino family, which is known for being user-friendly and versatile.
The Uno board is especially popular due to its simplicity and power, making it perfect for anyone who wants to experiment with electronics.
This microcontroller board has 14 digital input/output pins, six analog inputs, a 16 MHz quartz crystal, a USB connection, a power jack, an ICSP header, and a reset button.
You get all of this in a compact, robust design that’s ready to be used in a variety of applications.
Starting with the Arduino Uno is straightforward and exciting. First, you’ll need the board itself, a USB cable, and a computer. Here’s a simple step-by-step guide to help you get started:
Download the Arduino Software: Head over to the official Arduino website and download the Arduino software (also known as the Arduino IDE). This software is where you’ll write and upload your code to the Uno board.
Connect Your Arduino Uno: Use a USB cable to connect the Arduino Uno to your computer. The USB connection not only uploads your code but also powers the board during the process.
Install Drivers: If it’s your first time connecting the board, you might need to install some drivers. The Arduino IDE will prompt you if necessary.
Open the Arduino IDE: Launch the Arduino software on your computer. Here, you’ll see a simple interface where you can write your code.
Upload Your First Sketch: Arduino programs are called sketches. The Arduino IDE comes with plenty of examples to get you started. Go to File > Examples > 01.Basics > Blink. This sketch will blink the onboard LED, giving you immediate feedback that everything is working correctly. Click the upload button, and watch your Arduino Uno come to life!

Lorem ipsum dolor sit amet, consectetur adipiscing elit. Ut elit tellus, luctus nec ullamcorper mattis, pulvinar dapibus leo.
The Versatility of Analog Inputs and Digital Pins
One of the great features of the Arduino Uno is its versatility in handling both digital and analog inputs.
– Digital Pins: The Uno board has 14 digital pins, which can be used as inputs or outputs. These pins can control LEDs, read buttons, or interface with other digital sensors and devices.
– Analog Inputs: There are six analog inputs on the Uno board. These inputs can read a range of values from sensors like temperature, light, or potentiometers. Analog inputs are essential when you need more than just an on/off signal.
Using these inputs and outputs, you can create a wide array of projects, from simple LED blinkers to more complex systems like a home automation setup. The Arduino software makes it easy to read from and write to these pins with just a few lines of code.
Powering Your Arduino Uno R3
Your Arduino Uno can be powered in several ways, giving you flexibility based on your project needs.
– USB Cable: When you’re programming or working on a project connected to your computer, the USB connection provides both data transfer and power.
– Power Jack: For standalone projects, you can use the power jack to supply power. The Uno board can handle input voltage from 7 to 12 volts through this jack. This is great for more permanent installations where you don’t want to rely on your computer for power.
– Vin Pin: Alternatively, you can use the Vin pin to supply power directly to the board. This method is less common but offers another option for powering your projects.
The onboard voltage regulator ensures that your microcontroller receives a steady 5V, regardless of your input source, making it easy to switch between power sources without worrying about damaging your board.
Lorem ipsum dolor sit amet, consectetur adipiscing elit. Ut elit tellus, luctus nec ullamcorper mattis, pulvinar dapibus leo.
The Value of Open Source
One of the most significant advantages of the Arduino Uno and the entire Arduino platform is that it’s open source. This means that all the design files, software, and documentation are freely available.
– Hardware: The design schematics of the Arduino Uno are open, allowing you to modify and create your own versions if needed. This openness fosters innovation and customization.
– Software: The Arduino software is also open source, allowing developers to contribute to its development and improve it continuously. This community-driven approach ensures that the software stays relevant and updated.
– Community: Being open source has created a vast and active community around Arduino. There are countless tutorials, forums, and resources available online.
If you ever get stuck, a simple search will usually point you to a solution, thanks to the collective knowledge of Arduino enthusiasts worldwide.
This openness provides immense value, making Arduino not just a tool but a platform for learning, innovation, and sharing.
Real-World Applications and Projects
The Arduino Uno isn’t just a learning tool; it’s also used in various real-world applications. Here are some examples to inspire you:
– Home Automation: Use the Uno board to control lights, temperature, and security systems. With a few sensors and actuators, you can automate your home to make it smarter and more efficient.
– Wearable Technology: Create wearable gadgets that can track your fitness, monitor health parameters, or even interact with your smartphone. The compact size and versatility of the microcontroller make it perfect for wearable tech.
– Robotics: Build robots that can navigate, sense their environment, and perform tasks. Whether it’s a simple line-following robot or a complex humanoid, the Arduino Uno can handle it.
– Art Installations: Combine technology and creativity by using the Arduino Uno in art projects. From interactive sculptures to light shows, the only limit is your imagination.
– Education: The Arduino Uno is widely used in educational settings to teach programming, electronics, and engineering. It’s a fantastic way to engage students with hands-on learning.
